Showing posts with label projects. Show all posts

Friday, July 1, 2022

Mantle Project- Finished!

 I'm finally getting around to posting the results of a couple of years ago, when we completed installing the Greek Revival fireplace and Delft/Spode/etc. tile insert. As this was originally done at Christmastime, you'll forgive the decor being odd for my summer posting.

Not only did it end up being, I think, a really perfect addition to the room, but it quite handily provided a better spot for the tv than the somewhat lower, all-black, massive console which had previously stood in its place (and which we donated to a local charity shop). In order to take care of the many irregularities in the wooden backing of the mantle itself my partner first build a U-shaped structure that attached to the wall. To fit it as closely as possible it was necessary to decide whether to cut into the existing skirting boards at the base of the wall, or to notch out the dimensions of the board from the base of the box. I was concerned that, should we decide to the move the fireplace unit with us to another home, that we'd regret making modifications to it, but my partner assured me that we'd likely meet a similar issue in the next home, and that he could replace the box easily enough. 

The next step was to build and attach the tiled insert, which we did with a piece of MDF (IIRC, from what he did), and to tile the front much as one would do in a kitchen or a bathroom. Since many of the tiles are original, and in some cases antique, Spode or Delft tiles I took the opportunity to photograph them from every angle, including the back first. I arranged them for him in an order that made sense to me, no two tiles being too similar next to each other. You'll note that several of them have nautical or boat themes, which is deliberate as several of the paintings in the room are either of water or of boats. That being done, he tiled the insert and attached it to the box, and then set about building the platform for the fireplace insert itself. This is really just a simple, small, rectangular box, which I then painted with the same paint I used for the sanded areas of the outer mantle. 

We plugged the fireplace in and scooted it into place, to check that everything worked. At this point we knew that there would be a small gap between the upper edge of the tiling and the lower edge of the mantle itself. Initially we thought that this might not be too distracting and would provide needed ventilation; but the insert actually vented very well from the front of the unit and I did find the gap distracting. The solution was the buy a piece of pre-painted white molding, cut it to size and adhere it to the inside edge of the mantle so that it sits above and in front of the tiled section. No one would ever be the wiser (except that it's on the internet now).

Finally, we moved the antique mantle into place, leveled it, and attached it to the box and frame, which are screwed into the wall with huge anchors. There was some touch-up painting, and some rather more extensive painting of the box; which should have been done before most of the rest of the process, but wasn't due to time constraints owing to when my partner could be in town.


It being Christmastime when everything was completed, we had to decorate with some evergreens and holly from our own property, as well as the blue and white porcelains which I collect. Then we hung some stockings. 

This year, almost a year after it was initially completed, my husband and I were able to hang one more in joyful anticipation of what the new year would bring. 


Thursday, December 3, 2020

Mantle Project Update 1


I've been promising to do this for a while, and we are so close to having this project done so it seems like the perfect time for an update. First of all, you may be wondering why it's taken this long to actually make significant progress on the mantle. The main reason is simply that the majority of the work is being done for me by my partner who does not live with me full time, so we can only really do most of the tasks when he's in town certain weekends. We also had to pause when it turned out that I didn't have as many tiles as I thought I did and had to order more and wait for them to come in. All that being said, we have made it to a great place now and the project is looking splendid!


It started with a plan for how the fireplace insert and mantle would need to be connected in order to create the right look while still allowing us to pull out the insert for maintenance or to unplug it if, for instance, it needed replaced. My idea, after watching some tutorials and checking out DIY blogs, was for a sort of U-shaped shell attached to the back of the mantle, with a platform for the insert to sit on, and a thin flat behind the mantle that the tiles would be attached to. My partner quickly chucked this idea (and my measurements) when he realized that there was all kinds of crazy woodwork shenanigans going on behind the 19th century mantle. The platform remained a good idea though, and once the tiles came in we were able to adhere them to the simple backing panel, though they are admittedly more uneven than desired. Perfection was never the goal, on the other hand. 

The insert came from Wayfair, and originally I picked up one that was too small. I was trying to keep things as economical as possible, but it showed up looking absolutely diminutive compared to the hulking mantle and had too much space on the sides, so in the end I went for the Gibbs Flat Electric Insert at 19.9" H x 28" W x 8.5" D, which I paid just under $300 for (it's now a bit higher so I'm glad I got it on sale when I did).


My main contribution to this project, other than the research and purchasing, has been the sanding, of which there has been a lot! As an antique this mantle was never going to be perfectly smooth and unscarred, which is perfectly okay because I love its history and character. That being said, I did want to repair some of the peeling areas of paint and get rid of residual plaster from old finishes. There were quite a few areas that needed work, as you can see from the photos. The duck egg blue is obviously not original, but it is one of the things I liked about the piece when I first saw it online, so that stays. I found an interior paint at a local retailer that was pretty close to the existing color, and bought my first electric sander just for this (again, I went for a cheap model because I wanted to make sure I wasn't overspending on something I might not use frequently). Of course some of the areas are flatter and more accessible than others so I also had to buy a small hand-sander for the tight places and after that it was just a lot of elbow grease, which I don't mind. The holes in the top of the mantle were where it was originally fixed to the wall, and will be re-used here before being puttied and painted (probably, we'll see how visible they end up being). In recent days the repainting has been my main task with this, as my partner has been back home for a few days.

No sooner had he put together the box and attached the tiled panel than I was dying to try it all out together just for a sense of the finished project, but he was still cursing the odd dimensions. Not only was there a lot of patching on the back of the mantle that supported weaker areas, but it was very uneven meaning that one side stood out further than the other although not visible from the front. There are also standard sizes for things today, like an average height for a fireplace mantle, and that wasn't really true 200 years ago, so standard cuts of woods weren't lining up easily. Bless his heart, he dealt with it, adding a lip to the edge that the mantle slots onto and carving off fractions of inches to ensure that it all lined up. I should take a moment to mention that in his daily work he is NOT a carpenter and that this is not a typical kind of project for him, so I am extremely grateful and I think he did admirably well. And that's where he left it as he headed home Monday morning...

Of course I couldn't resist dragging the parts together to see how it was all going to look, more or less. 


Stay tuned as we're planning to finish this project this coming weekend, just in time to hang some stockings!


Saturday, August 8, 2020

For Your Chateau

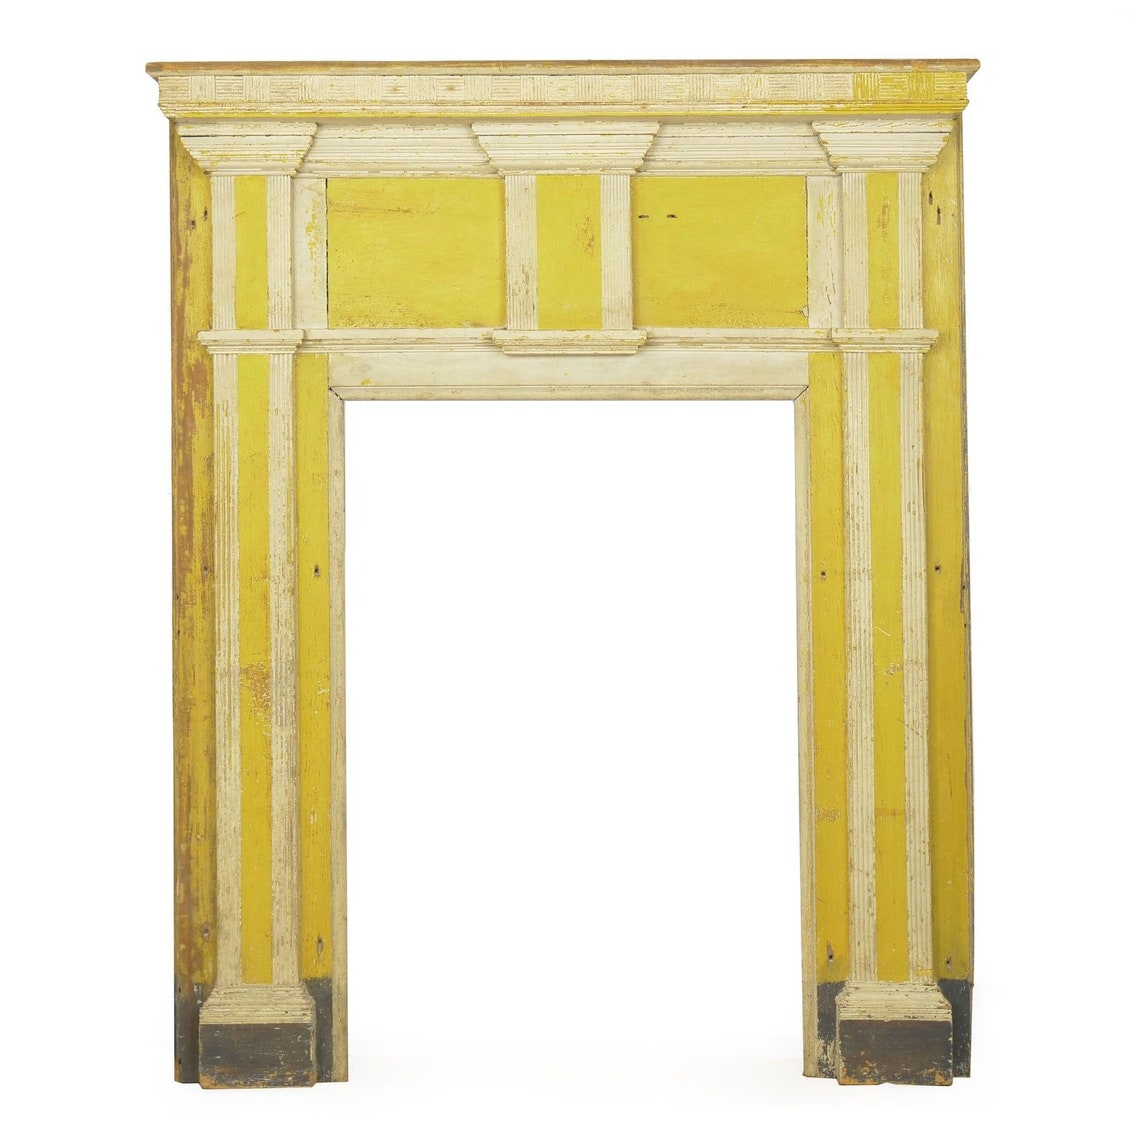
ANTIQUE FIREPLACE SURROUND  Fireplace Mantel Fireplace image 0 If you saw my last post about acquiring my new fireplace surround, and the Greek Revival style and related interior designs of the 18th and 19th century, then you'll have been introduced to a few examples and suppliers. If, however, you are hungry for more, then feast your eyes on the following.

The  first  image is a good example of a similar piece, just slightly earlier in the American Federal style, and  also of the relative cost of such pieces. Available on Etsy, it will set you back a mere $2,500. Love the look, but don't need the genuine antiquity or the cost? You could have a modern version custom built for you, as in this version, also from Etsy. At $425 it is considerably less expensive of an option, however would still need not only an insert, but a full box to set it out from the wall. Then again, it would be perfect for anyone trying to renovate an existing fireplace. Perhaps money is no object for you (lucky you, if so!), in which case you might be interested in some Ebay listings such as this one in marble, but note that it's local pick-up only so, New Yorkers, this one's for you.
  

If you, like me, don't have a ton of money on hand, but still really want to renovate an existing fireplace to a more historic style or add a new one, check out DIYs like Young House Love or Adora Mae. Either way, happy hunting!


Friday, August 7, 2020

And We're Back! (With A New Project)

Bonjour world! It's been many (six?!) years since I last updated this blog. In a nutshell, life and work became crazy and difficult and terrible and full of change and renewal. Like many of you, quarantine life has afforded me some time to recall the things that I enjoyed doing and to refocus my energy. For those who enjoyed the Diary entries from my fictional 18th century counterpart, I suspect she'll be back shortly, so look out for more missives coming soon! 

One of the things I have been busy with in the intervening time is buying my first home and fixing it up. It's not a grand chateau or anything (although have you seen the prices of derelict chateaux these days?!? It's enough to make one consider really moving to France.), but it is home and it is mine. It's great in that it is quite enough space for me, but not too much space to take care of; however I have always felt the lack of a fireplace. I'm cold by nature. I was on a tour of Jerusalem a couple of years ago and my guide kindly informed me that cold hands mean a warm heart, I hope he's right. The idea of walking into my home after work on a winter's day, or coming in from gardening in the autumn, to a fire in the hearth is appealing on many levels. So fast forward to a few days ago when I was trawling the internet and stumbled across this absolute find from Vintage American Home.

It's not often that you can find a genuine 19th century antique fireplace for under a few thousand dollars (or pounds in this case); although if you're persistent bargains do pop up sometimes, as in some ebay listings. Just be sure to double-check on shipping costs or pick-up requirements. I've seen many listings where the shipping was more costly than the item!

The next step will be to acquire a fireplace insert, since the house obviously doesn't have a chimney and can't support a real fire. I'm leaning towards one from Wayfair at present, since I have had good experiences with several of their products in the past.

Now, obviously Greek Revival is a mid-19th century style, not in keeping with my 18th century proclivities; but the two time periods share a love of classical elements in part due to the excavations of Pompeii and Herculaneum beginning in the 1730s and 40s. This is why it is not uncommon to find fluted columns and laurel wreaths as motifs in both Neoclassical architecture and Greek Revival. 

The other reason, of course, is that on either side of the pond, both in Europe and in America, there were shifts in social identity. In Europe Rousseau's philosophies were influencing people to look to the past for examples of a simpler style to contrast the ostentatious ornamentation of the Rococo swirls and florals. The Revolutionary French government and its supporters likewise hoped to utilize the imagery of the idealized Greek city state to help legitimize the new regime. 

Meanwhile in America a new sort of gentry was trying to create their own style and legitimacy. Southern landowners saw themselves much as the elites and cultural aristocrats of their new nation, and as the United States moved into the new century they adopted Neoclassicism with their own twist which eventually developed into the Greek Revival style seen so often in plantation homes and civic buildings of the mid-19th century. 

When I saw the dentil molding, fluted Ionic columns, and wreath motif I recognized the Greek Revival style and thought it would suit my sitting room very well. Although it is quite a large piece at 47" x 58" it so happens that the room in question is by far the biggest in the house with a vaulted ceiling and one blank wall between a window and the back door, which is the focal point as soon as you step through the front door into the entry hall. The real bonus is that it had previously been restored with a bit of blue accent painting, which makes it perfect for my already cream and blue theme. 
The next steps will be to sand down the rough and chipped paint, repair the weak areas in the woodwork, and build out the box at the back to accommodate the full insert. It will actually be very hard to find an insert that fills the whole opening, but here a fault is actually an opportunity because I have a small collection of Delft-like blue and white tiles that I will cover an interior section with to create the perfect frame for my new fireplace.

Different surround than on the floor...Fireplace with blue and white Delft tile

Friday, May 23, 2014

The costuming bug bites

Every summer I have these grand plans about all the costumes I am going to make, and then I'm lucky if I get three done. Sometimes this is because of administrative things for the University, and sometimes it is due to my own distraction. Right now I should be building the Tudor Transitional project which has been on hold for months, or starting on the late-18th century travel outfit that was designed years ago. Instead I find myself with a strong desire to "knock out a sacque-backed gown" as if it were just that simple.

Nevertheless, I invite you to share in my distraction while I indulge in some of my favorite inspirations...

Princesse de Lamballe
This portrait of the Princesse de Lamballe is one of my favorites, with the cream lace over the soft lilac color, and the deep flounce at the hem. I go back and forth on whether or not I like the echelles-style stomacher, but the sleeves are luscious.
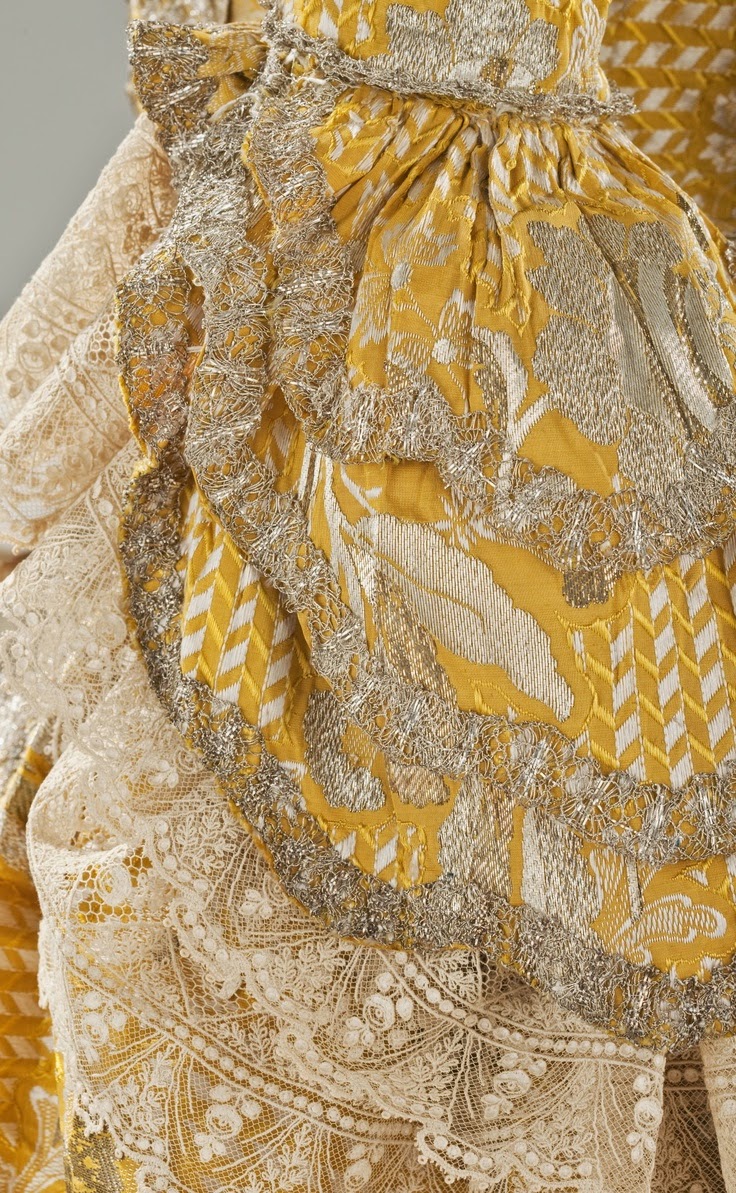
Speaking of sleeves, these ones from c.1760 have a really interesting lace pattern, gilt trim, and the scalloped edge that give them that wow-factor I know I'm drawn to.

I'm also drawn to this 1750s court dress, and the way the passementerie is really large at the front edges of the skirt, and then scaled back on the bodice. I'm a small woman, so large trims can overpower me if I'm not careful. Someday I will have a court dress like this, but that is not this project. Must stay focused!
It's the way the back pleats appear to hang off of the neckline trim on this 1775-80 ivory moire silk. There's a simple beauty to that which I cannot help wanting to recreate.
Finally, though this c.1780 sage gown is a different style, I think the color combination would be stunning with some taupe and gilt trim. It would also go with my sage-colored Georgianas from American Duchess.

Surely I can squeeze this project in, right? Maybe with a coordinating Bergere?


Saturday, March 3, 2012

Regency Picnic Dress

Well I am excited, dear readers! For the first time I have an event to go to in costume. The Regency Society of Virginia has a picnic coming up at the end of May and I intend to attend. Of course, now I need to really get cracking on a proper Regency wardrobe. I was thinking of this:-
Instead of the parasol I may do simply a shawl, and in place of the strange runway-styling headdress a shading and lovely bonnet. Who doesn't love a bonnet? I'm a big fan of ice blue and tend to look well in it, so I'll likely leave the color scheme as it is.

Updates to come; oh, and I'm currently working on my portrait bracelets and a brise fan so I should have a post or two about that in the near future too.

For Your Chateau

  With another successful Fetes Galante complete at the Chateau de Versailles, I thought we'd have a Versailles-themed FYC. Enjoy this d...